

Angular Walkthrough Part 3: The Lay of the Land
Hey folks! Welcome back to another round of my Angular tutorial! For this section, we will be going over how some of the moving parts in Angular work together to deliver a user experience. Before we get started, I encourage you to clone my Github repo for this post or run it code in Stack Blitz so that you can follow along with the tutorial. Please note that this is a VERY brief overview of all the moving pieces, and everything I discuss will be covered with much more detail in future posts.
The App Module
As discussed before, all new Angular applications come with an app.module.ts file with an NG Module decorator. Looking in our App Module, we can see all the items we are importing, which includes multiple modules, a couple components, and a service.
import { BrowserModule } from '@angular/platform-browser';
import { NgModule } from '@angular/core';

import { AppRoutingModule } from './app-routing.module';
import { AppComponent } from './app.component';
import { TestCompComponent } from './test-comp/test-comp.component';
import { TestSrvcService } from './test-comp/services/testsrvc.service';
Looking in our NgModule decorator, we can see that we are organizing these items into specific arrays.
@NgModule({
  declarations: [
    AppComponent,
    TestCompComponent
  ],
  imports: [
    BrowserModule,
    AppRoutingModule
  ],
  providers: [TestSrvcService],
  bootstrap: [AppComponent]
})
export class AppModule { }
This helps Angular determine what type of file it will be working with when running our app. In our current setup, we have four different arrays…
Declarations: Allows us to declare all the components that will be utilized by our app module. For this tutorial, we are using the AppComponent and the TestCompComponent.
Imports: Holds the feature modules that we are importing into our application. In this case, you can see that we are importing the BrowserModule and AppRoutingModule feature modules.
Providers: Allows us to specify which services we would like to inject into our application. In this case, we wish to have the TestSrvcService available to inject.
Bootstrap: Tells our App Module which component we wish to spin up first when running our app.
Looking at our Bootstrap array, we can see that we are using the App Component when we first run our Angular application. Let’s look at this component further.
The App Component
Diving into the app.component.html file, we notice a couple differences from the regular markup that we are used to seeing. For starters, let’s look at the first line of our code.
<p *ngIf="this.router.url === '/'">At first glance, it may seem like a plain paragraph tag, but looking immediately after the opening of it we see *ngIf. What is this? *ngIf is just one of many directives that allows us to add programming functionally to supplement our HTML code. In this case, we are saying, “If this.router.url is equal to root, show a link with the text of Route Example”. By now you may be wondering where Angular gets the value for this.router.url. Let’s take a quick peek at the Typescript file to find out.
import { Component } from '@angular/core';
import {Router} from '@angular/router'

@Component({
  selector: 'app-root',
  templateUrl: './app.component.html',
  styleUrls: ['./app.component.css']
})
export class AppComponent {
  title = 'test-app';

  constructor(private router: Router){}
}
Looking at the 2nd line of code, we see we are importing a class called Router. In the constructor, we use the Router class to make an object called router. This is the object that will hold the url member. The Router object assigns a value to url depending on our location in the application. Because of that, we are able to call that value and use it for what we need. In our HTML file, we want to use that value to check if we are at the root of our app (localhost:4200/).
Back at our app.componet.html file, we see another directive called routerLink.
<a routerLink="test-comp" role="button">Route Example</a>This tells Angular to take us to a component associated with the text “test-comp”, if it is clicked on. This association is defined in our app-routing module.
App Routing Module
Open up app-routing.module.ts and you will see the code below:
import { NgModule } from '@angular/core';
import { Routes, RouterModule } from '@angular/router';
import { TestCompComponent } from './test-comp/test-comp.component';

const routes: Routes = [{ path: 'test-comp', component: TestCompComponent}];

@NgModule({
  imports: [RouterModule.forRoot(routes)],
  exports: [RouterModule]
})
export class AppRoutingModule { }
We see that we have an array of Route objects, called routes. Remember how the routerLink directive from app.component.html was set to use test-comp? Looking in the array, we see a Route object with path of “test-comp”, and that same object’s component is set to “TestCompComponent”. This means that when our specific routerLink is engaged, Angular will look in app-routing.module.ts for a matching value. If it finds one (in this case test-comp) it will find the related component (TestCompComponent) and take us to it.
TestCompComponent
If we drop down the contents of the test-comp directory, we see we have four items: A CSS file (which we are not concerned about at this time), and HTML file, a TS file, and a services folder (more on this later). For now, let’s observe our test-comp.component.html file.
<div *ngIf="this.randomNumber % 2 === 0;else other_content">
  <p>{{this.randomNumber}} is even</p>
</div>
<div>
  <ng-template #other_content>
    <p>{{this.randomNumber}} is odd</p>
  </ng-template>
</div>

<br>

<div *ngIf="this.overFive">
  <p>The number displayed above is over five.</p>
</div>
<a href="javascript:location.reload(true)">Refresh this page</a>
In test-comp.component.html, we once again see an *ngIf directive, but this time implementing a feature we have not seen before. It is checking if the value of this.randomNumber is divisible by 2. If it is, we display the content in the top-most div tag, which shows our number and states that it is even. If it is not, we call other_content, which happens to be the name of an ng-template we are using in the 2nd div tag In other words, if this.randomNumber is not divisible by 2, the ng-template with the label of other_content will render in our browser, showing our number and stating it is odd. Regardless of which content is displayed, we are showing the value of this.randomNumber by calling it out in between two sets of curly brackets. This is called string interpolation, and it lets us dynamically display values on our html markup.
Towards the bottom, we have another *ngIf directive checking the value of this.overFive. If it is true, we will display a paragraph element stating that the number displayed above is over five. We have also added at the bottom to allow us to reload our page. Now let’s look at test-comp.component.ts to see how overFive and randomNumber are being set.
import { Component, OnInit } from '@angular/core';
import { TestSrvcService } from './services/test-srvc.service';

@Component({
  selector: 'app-test-comp',
  templateUrl: './test-comp.component.html',
  styleUrls: ['./test-comp.component.css']
})
export class TestCompComponent implements OnInit {

  randomNumber : number;
  overFive : boolean;

  constructor(testSrvcService: TestSrvcService) {
    this.randomNumber = testSrvcService.getRandomNum();
  }

  ngOnInit() {
    this.checkIfOverFive();
  }

  checkIfOverFive(){
    if (this.randomNumber > 5){
      this.overFive = true;
    }
    else {
      this.overFive = false;
    }
  }
}
Right away, we can see that we are defining randomNumber and overFive, but we also appear to be setting datatypes as well. This strong typing is the prominent feature of TypeScript, as it will prevent our code from compiling if we attempt to assign a value to our variables that do not have matching datatypes.
You will also notice we have defined a function called checkIfOverFive towards the bottom of the file, and depending on the value of randomNumber, we will assign true or false to overFive. This function is then called in a Life Cycle hook called ngOnInit. A Life Cycle hook is a feature that allows us to execute specific code during certain life cycles of our component. In this case, we want to run checkIfOverFive upon initialization of our component, so we use ngOnInit.
Finally, we see we are injecting the TestSrvService into our constructor, and using it to call a function called getRandomNum (whose value will be assigned to randomNumber).
TestSrvService
If we drop down the contents of our services directory (within or test-comp directory) and open the test-srvc.service.ts we see the following code:
import { Injectable } from '@angular/core';

@Injectable({
  providedIn: 'root'
})
export class TestSrvcService {

  constructor() { }

  // returns random number between 0 and 10
  getRandomNum() {
    return Math.floor(Math.random() * Math.floor(10));
  }
}
Looking at our getRandomNum function, we see that we are simply returning a randomly generated value between 0 and 10. Since the generation of random numbers is not specific to the view, we have chosen to delegate this functionality to our service.
Running Our App
Okay! Let’s run this app and see if it works. First we type in ng serve -o to start the local dev server.
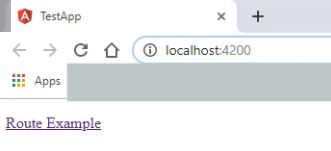
We see the route example link clicking on it will take us to TestCompComponent
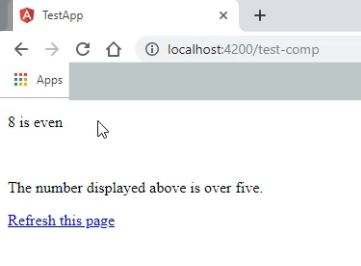
We also see a reload of the page changes the value of this.randomNumber.
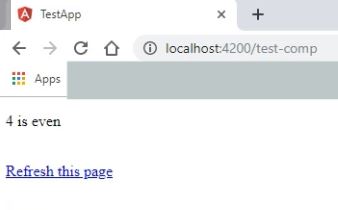
And another refresh gives us an odd number.

Excellent! Our app is working as expected. Now it is time for us to drill deeper to really understand each individual piece of the Angular puzzle. Join me next time as we explore in detail how routing works in an Angular application. Until then, take care and have an excellent day!