
Exploring Entity Framework Part 4: The Model First Approach
NOTE: This post is part of a series on Entity Framework 6. To help cut back on overlapping content, this post will not cover any concepts that were previously discussed earlier in the series. If you have not read my previous three posts, you can access them from the links below:
Exploring Entity Framework Part 1: A Brief Overview
Exploring Entity Framework Part 2: The Code First Approach
Exploring Entity Framework Part 3: The Database First Approach
Welcome back everyone! I apologize for the lengthy delay in getting this post out. I had the opportunity to reconnect with old friends over the last few weeks, plus I had family from the south staying over in our guest room (adjacent to my home office).
In my last post I discussed using the database first approach, a nifty method that allows your application’s models to be “managed” by the database it is connected to. Before that, we discussed the Code First Approach, which allowed you to code your own models and have them pushed to the database. Today we will discuss another method that allows you to design your models/tables from your application, but without the nitty gritty programming seen in the Code First Approach. I am of course talking about the Model First Approach, which allows you to design your models with a GUI (Graphical User Interface) in place of code.
In this post, we will cover:
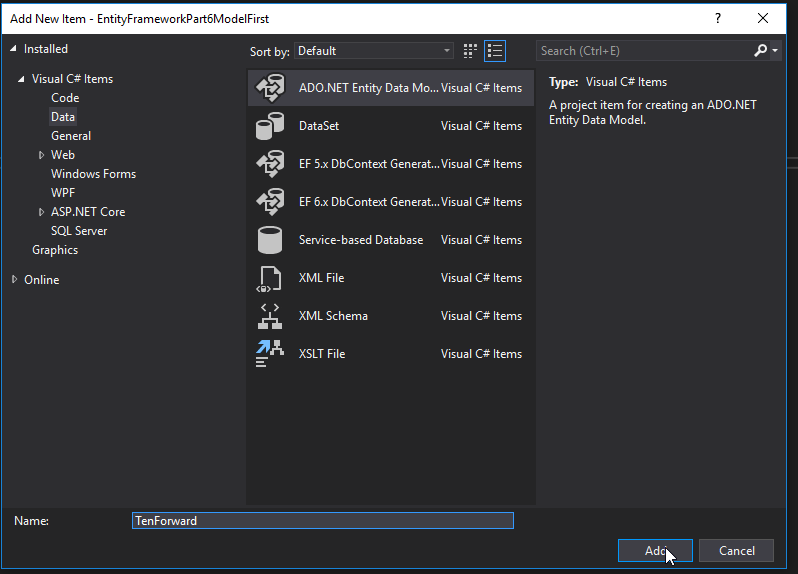
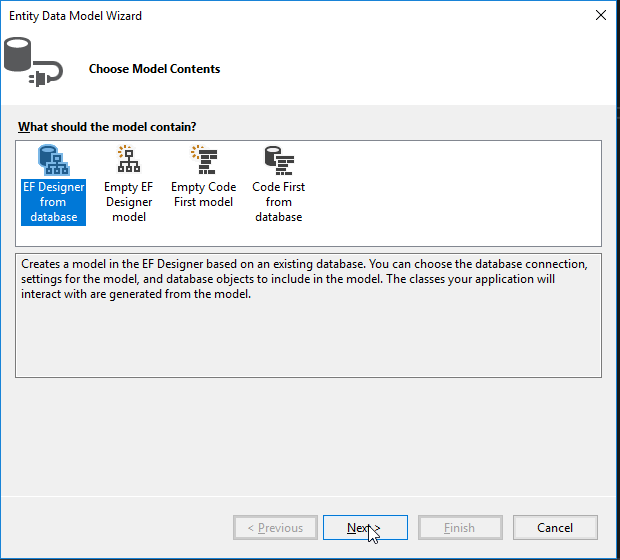
 Since I want my designs to be applied directly to my database as I am developing, I will chose EF Designer From Database, and then click Next.
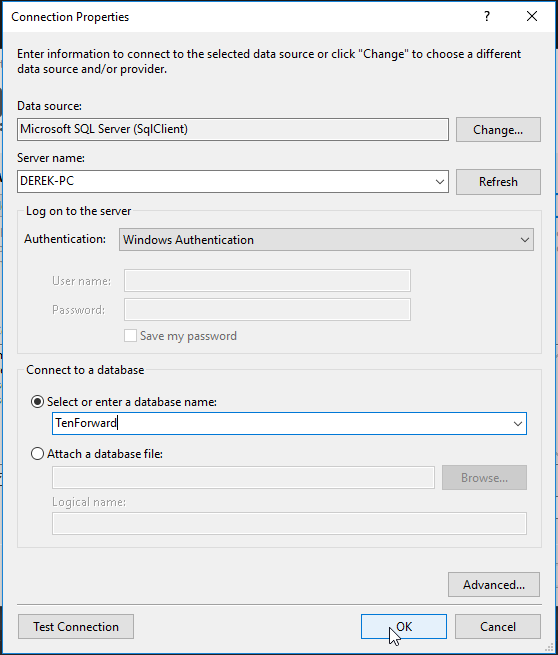
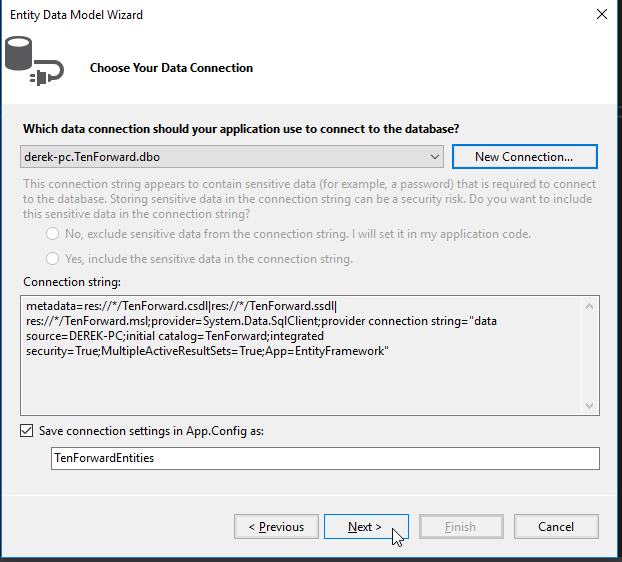
Click New Connection.
In the Server Name text box, select the server that hosts your DB, and then name your database.
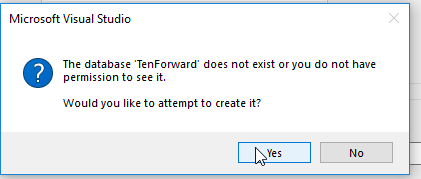
Click Yes to create the database.
Click Next.
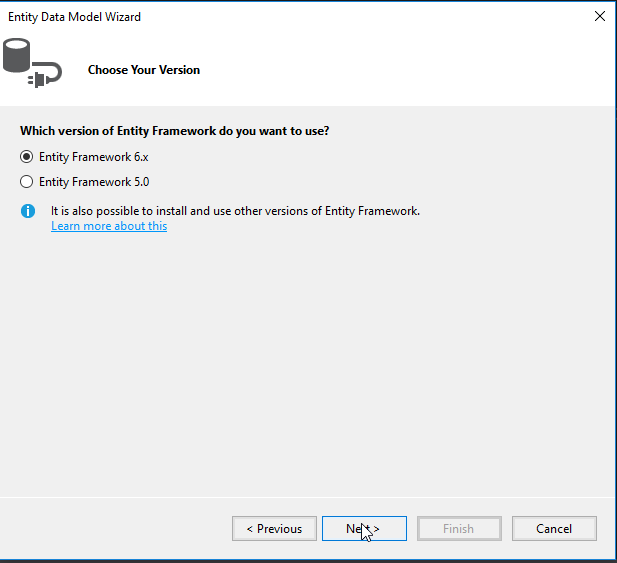
Select Entity Framework 6 and click Next again.
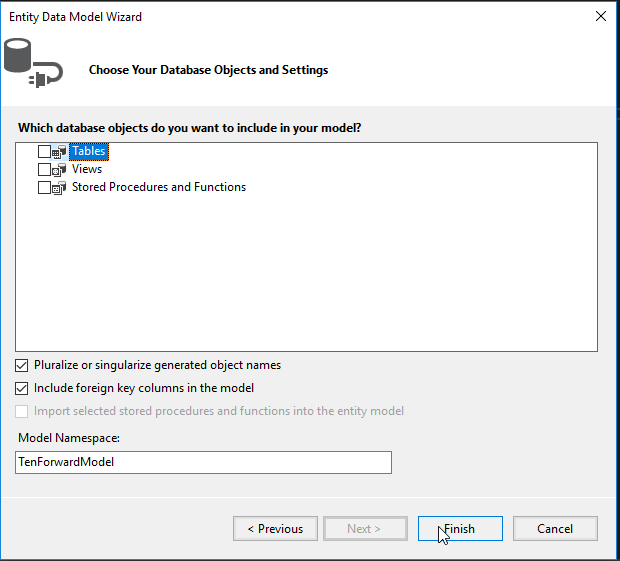
Then click Finish
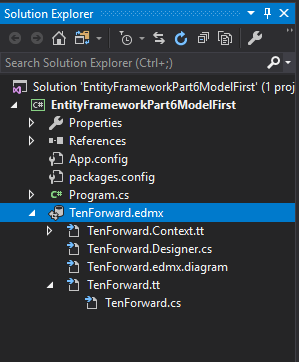
Let’s take a look at the Solution Explorer. As you will recall from the Database First Approach, an EDMX file was generated for us when we connected to new entities. The same has taken place here, but without models.
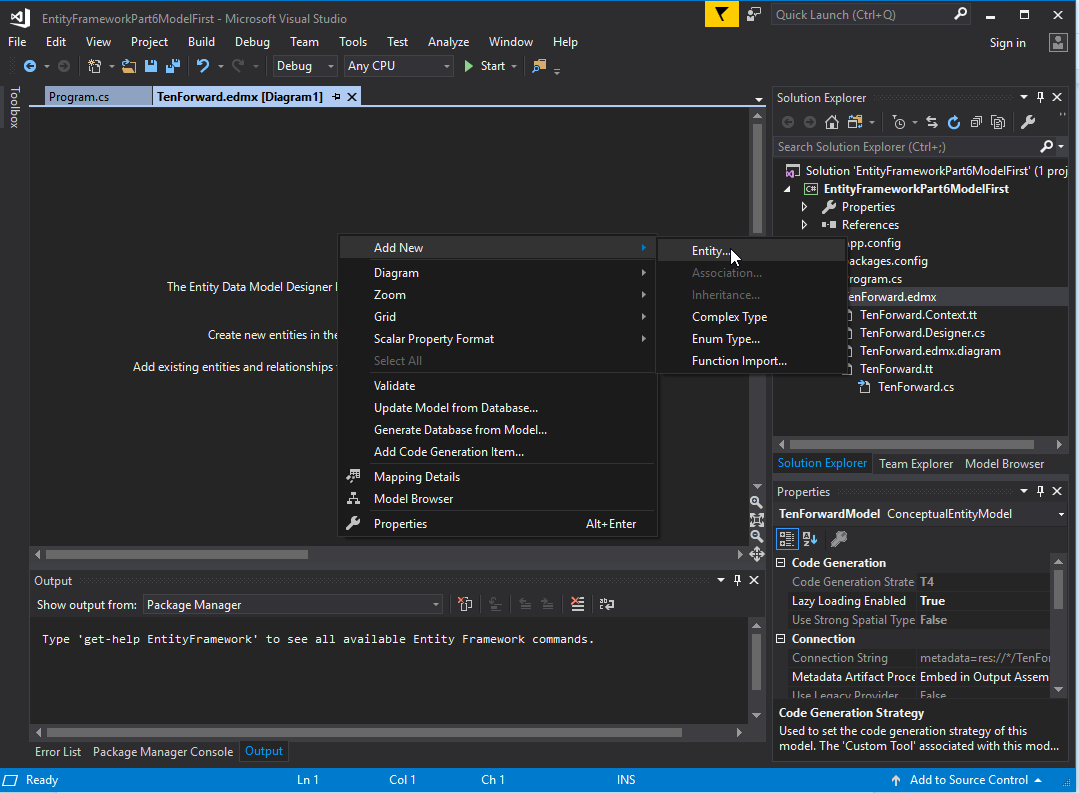
To create an entity, open your edmx file, right-click in the diagram, and select Add New → Entity.
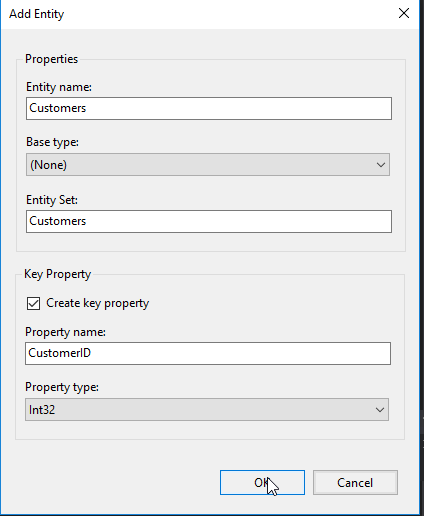
In the Add Entity menu, make the following changes to create a Customers model, then click add.
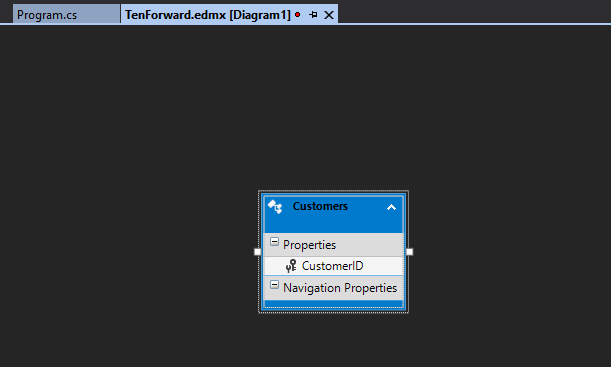
In our diagram, we can see a Customers model has been added with CustomerID set as the primary key.
Let’s add a few more properties to the entity to make it more meaningful. Right-click the entity, then select Add → New Scalar Property.
A new property is generated. In the properties window, change the name to CustomerName, and ensure the datatype is String and the Nullable option is false.
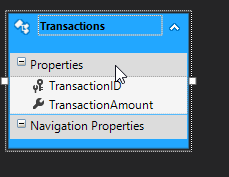
Create another Entity called Transactions with an primary key of TransactionID (Int32) and an additional property called TransactionAmount (string, not null).
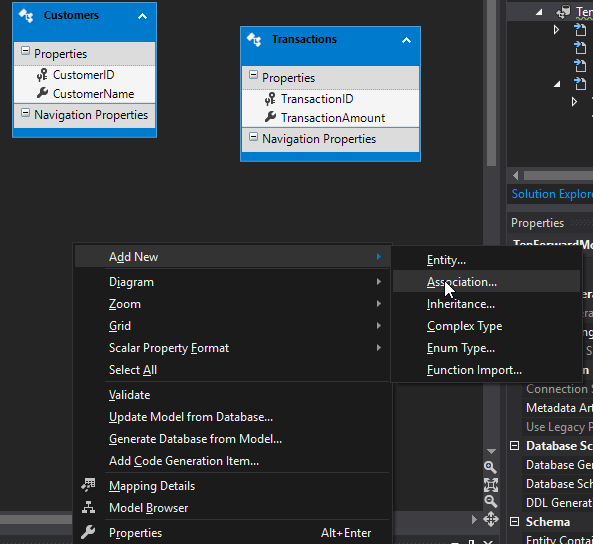
We want a customer to have one to many transactions. However, we first need to setup an association between our two models for this to happen. Right-click in the diagram and select Add → New Association.
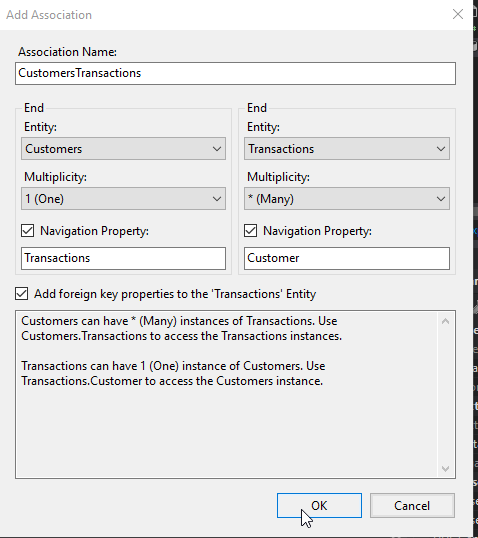
Since these are the only two models in our diagram, EF is guessing that we wish to have a one to many relationship between Customers and Transactions. Click Ok to generate the relationship.
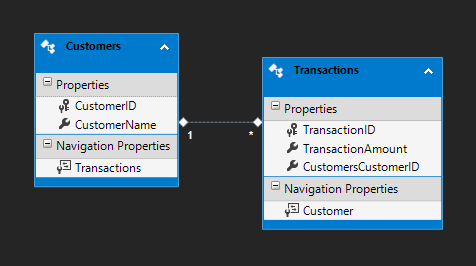
Looking at our diagram, we can see the relationship has been created and our models have been changed. Each model has a navigation property referencing the table it has a relationship to. Additionally, we see a foreign key in our transactions table called CustomersCustomerID, referencing our CustomerID primary key in the Customers model.
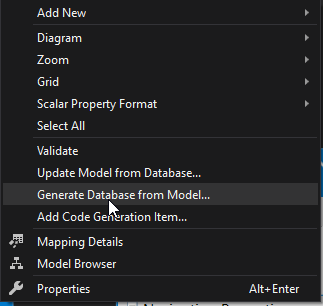
We want our changes to be applied to the database. To do this, right click in the diagram and select Generate Database From Model.
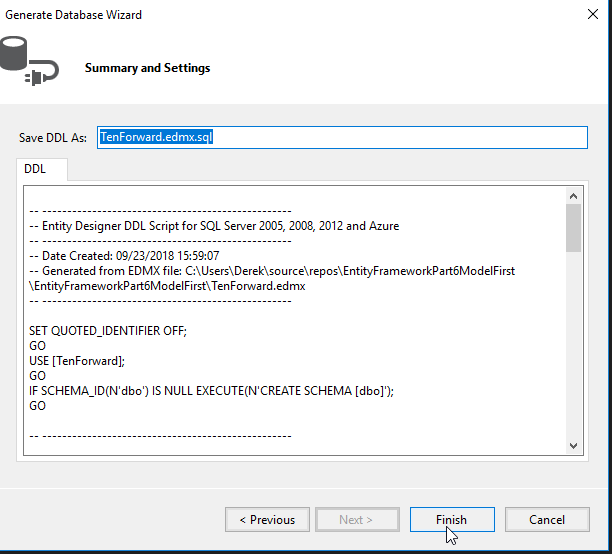
We see SQL that will be generated for us in a edmx.sql file. Click finish to generate the file.
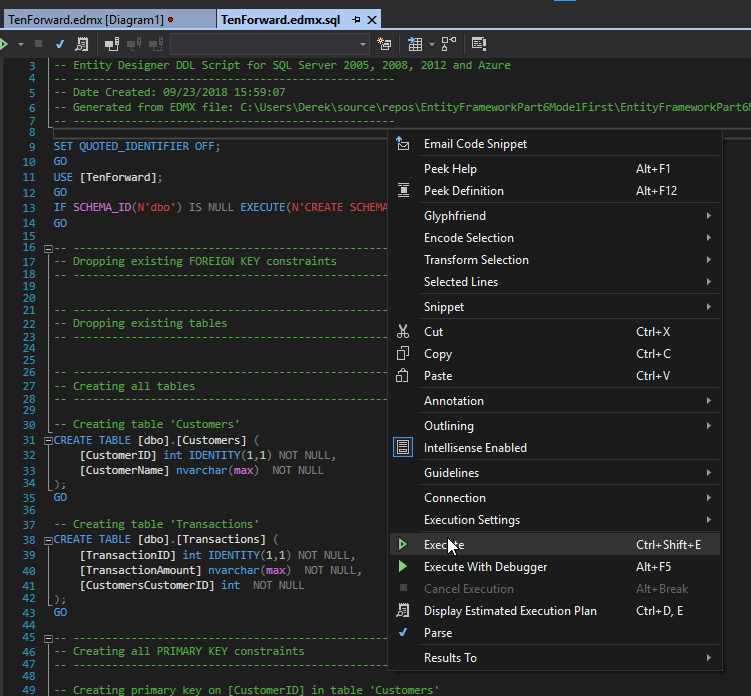
Open your edmx.sql file. Right-click anywhere, and select Execute.
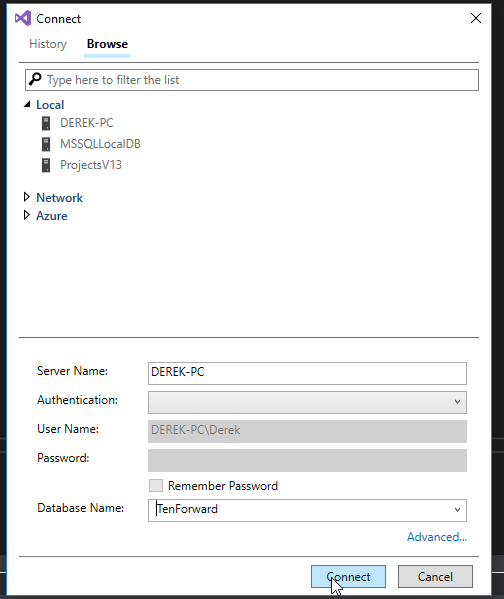
A Connect window is displayed. Locate your server and click on it to add it to the Server Name textbox. Then select your database from the Database Name dropdown menu. Finally, click Connect.
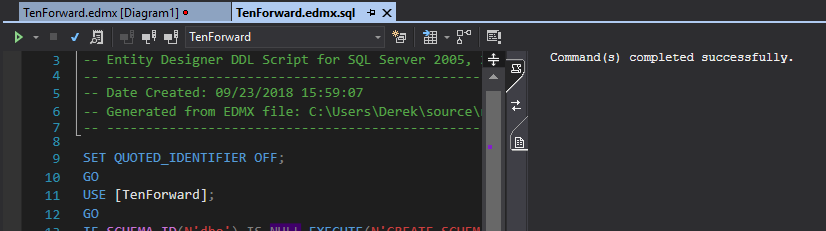
A window pops up showing that our commands have completed successfully.
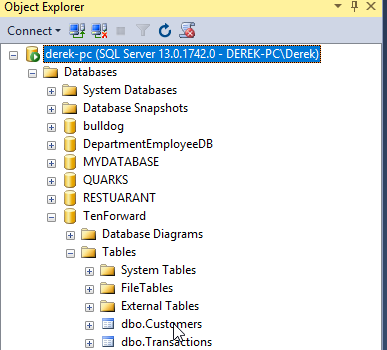
A quick check of our RDMS shows that the changes have been applied.
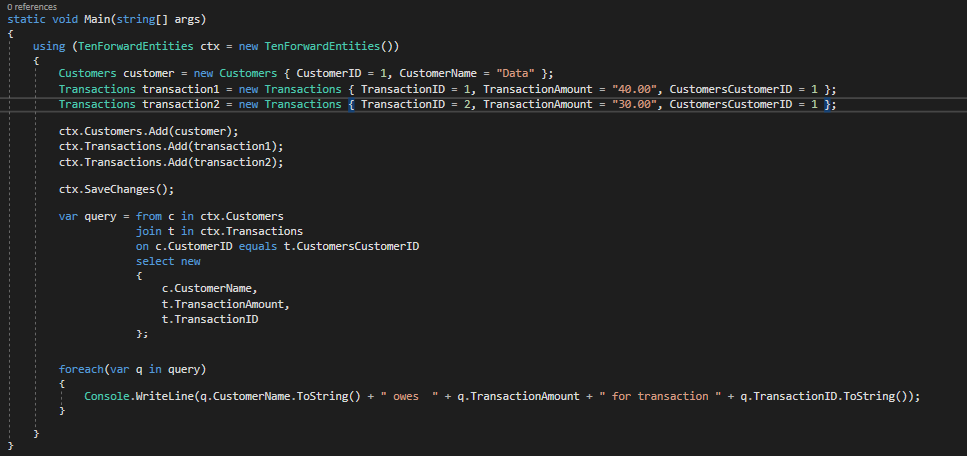
Now it is time to test our models. Input the following code into Program.cs to enter in data and query the database.
Program.cs
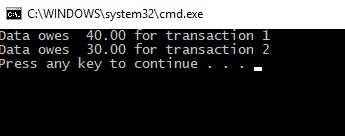
Run the program to confirm it works.
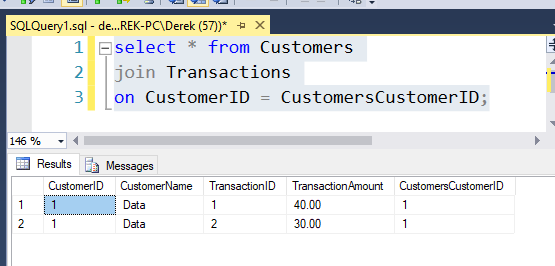
We can also see our changes applied in the database.
And there you have it! Our program is now able to communicate with the database we created!
Summary
The Model First Approach allows developers to design their models and model relationships using a GUI without using code. This approach is ideal for developers who design better models visually, or want to design an edmx file from scratch. All design changes can be pushed to a database using a remote SQL script from Visual Studio.
Thank you for joining me on this journey with Exploring Entity Framework 6! We have seen how the ORM gives us three ways to interact with the database (Database First, Code First, and Model First Approaches), and learned which approach is best for each situation and how to use them.
Have any questions, comments, or concerns about this post? Notice anything that can be added or approved? If so, please let me know in the comments. I look forward to hearing from you!
Since I want my designs to be applied directly to my database as I am developing, I will chose EF Designer From Database, and then click Next.
Click New Connection.
In the Server Name text box, select the server that hosts your DB, and then name your database.
Click Yes to create the database.
Click Next.
Select Entity Framework 6 and click Next again.
Then click Finish
Let’s take a look at the Solution Explorer. As you will recall from the Database First Approach, an EDMX file was generated for us when we connected to new entities. The same has taken place here, but without models.
To create an entity, open your edmx file, right-click in the diagram, and select Add New → Entity.
In the Add Entity menu, make the following changes to create a Customers model, then click add.
In our diagram, we can see a Customers model has been added with CustomerID set as the primary key.
Let’s add a few more properties to the entity to make it more meaningful. Right-click the entity, then select Add → New Scalar Property.
A new property is generated. In the properties window, change the name to CustomerName, and ensure the datatype is String and the Nullable option is false.
Create another Entity called Transactions with an primary key of TransactionID (Int32) and an additional property called TransactionAmount (string, not null).
We want a customer to have one to many transactions. However, we first need to setup an association between our two models for this to happen. Right-click in the diagram and select Add → New Association.
Since these are the only two models in our diagram, EF is guessing that we wish to have a one to many relationship between Customers and Transactions. Click Ok to generate the relationship.
Looking at our diagram, we can see the relationship has been created and our models have been changed. Each model has a navigation property referencing the table it has a relationship to. Additionally, we see a foreign key in our transactions table called CustomersCustomerID, referencing our CustomerID primary key in the Customers model.
We want our changes to be applied to the database. To do this, right click in the diagram and select Generate Database From Model.
We see SQL that will be generated for us in a edmx.sql file. Click finish to generate the file.
Open your edmx.sql file. Right-click anywhere, and select Execute.
A Connect window is displayed. Locate your server and click on it to add it to the Server Name textbox. Then select your database from the Database Name dropdown menu. Finally, click Connect.
A window pops up showing that our commands have completed successfully.
A quick check of our RDMS shows that the changes have been applied.
Now it is time to test our models. Input the following code into Program.cs to enter in data and query the database.
Program.cs
Run the program to confirm it works.
We can also see our changes applied in the database.
And there you have it! Our program is now able to communicate with the database we created!
Summary
The Model First Approach allows developers to design their models and model relationships using a GUI without using code. This approach is ideal for developers who design better models visually, or want to design an edmx file from scratch. All design changes can be pushed to a database using a remote SQL script from Visual Studio.
Thank you for joining me on this journey with Exploring Entity Framework 6! We have seen how the ORM gives us three ways to interact with the database (Database First, Code First, and Model First Approaches), and learned which approach is best for each situation and how to use them.
Have any questions, comments, or concerns about this post? Notice anything that can be added or approved? If so, please let me know in the comments. I look forward to hearing from you!
- How to design models with the GUI and push them to a database
 Since I want my designs to be applied directly to my database as I am developing, I will chose EF Designer From Database, and then click Next.
 Click New Connection.
 In the Server Name text box, select the server that hosts your DB, and then name your database.
 Click Yes to create the database.
 Click Next.
 Select Entity Framework 6 and click Next again.
 Then click Finish
 Let’s take a look at the Solution Explorer. As you will recall from the Database First Approach, an EDMX file was generated for us when we connected to new entities. The same has taken place here, but without models.
 To create an entity, open your edmx file, right-click in the diagram, and select Add New → Entity.
 In the Add Entity menu, make the following changes to create a Customers model, then click add.
 In our diagram, we can see a Customers model has been added with CustomerID set as the primary key.
 Let’s add a few more properties to the entity to make it more meaningful. Right-click the entity, then select Add → New Scalar Property.
 A new property is generated. In the properties window, change the name to CustomerName, and ensure the datatype is String and the Nullable option is false.
 Create another Entity called Transactions with an primary key of TransactionID (Int32) and an additional property called TransactionAmount (string, not null).
 We want a customer to have one to many transactions. However, we first need to setup an association between our two models for this to happen. Right-click in the diagram and select Add → New Association.
 Since these are the only two models in our diagram, EF is guessing that we wish to have a one to many relationship between Customers and Transactions. Click Ok to generate the relationship.
 Looking at our diagram, we can see the relationship has been created and our models have been changed. Each model has a navigation property referencing the table it has a relationship to. Additionally, we see a foreign key in our transactions table called CustomersCustomerID, referencing our CustomerID primary key in the Customers model.
 We want our changes to be applied to the database. To do this, right click in the diagram and select Generate Database From Model.
 We see SQL that will be generated for us in a edmx.sql file. Click finish to generate the file.
 Open your edmx.sql file. Right-click anywhere, and select Execute.
 A Connect window is displayed. Locate your server and click on it to add it to the Server Name textbox. Then select your database from the Database Name dropdown menu. Finally, click Connect.
 A window pops up showing that our commands have completed successfully.
 A quick check of our RDMS shows that the changes have been applied.
 Now it is time to test our models. Input the following code into Program.cs to enter in data and query the database.
Program.cs
Now it is time to test our models. Input the following code into Program.cs to enter in data and query the database.
Program.cs
 Run the program to confirm it works.
 We can also see our changes applied in the database.
 And there you have it! Our program is now able to communicate with the database we created!
Summary
The Model First Approach allows developers to design their models and model relationships using a GUI without using code. This approach is ideal for developers who design better models visually, or want to design an edmx file from scratch. All design changes can be pushed to a database using a remote SQL script from Visual Studio.
Thank you for joining me on this journey with Exploring Entity Framework 6! We have seen how the ORM gives us three ways to interact with the database (Database First, Code First, and Model First Approaches), and learned which approach is best for each situation and how to use them.
Have any questions, comments, or concerns about this post? Notice anything that can be added or approved? If so, please let me know in the comments. I look forward to hearing from you!
And there you have it! Our program is now able to communicate with the database we created!
Summary
The Model First Approach allows developers to design their models and model relationships using a GUI without using code. This approach is ideal for developers who design better models visually, or want to design an edmx file from scratch. All design changes can be pushed to a database using a remote SQL script from Visual Studio.
Thank you for joining me on this journey with Exploring Entity Framework 6! We have seen how the ORM gives us three ways to interact with the database (Database First, Code First, and Model First Approaches), and learned which approach is best for each situation and how to use them.
Have any questions, comments, or concerns about this post? Notice anything that can be added or approved? If so, please let me know in the comments. I look forward to hearing from you!